 This look is a mixture of many I’ve found on the internet under ‘doll,’ ‘ventriloquist dummy’ and ‘mime’ make-up tutorials. While I think it’s really creepy by itself, it can easily be added to to suit your costume: you could add fake blood, stitches, coloured contacts and lipstick to make this look your own.
Step 1 to 3
1. My relationship with face paint is pretty strained; cheaper, supermarket face paint tends to dry very quickly which can make application difficult. For this look I didn’t want a bright white face just a paler complexion so I mixed the paint with my normal foundation.
My eyebrows are pretty dark so I covered them using a glue stick (rub over the brow to flatten the hairs and allow to dry completely), top with a thick concealer and a dusting of powder.
2. Heavily contour the cheeks, nose, chin, forehead and underneath the eyes using a taupe coloured eyeshadow.
3. Blend fuchsia, red and grey-blue eyeshadow into the inner corner of the eye and bring it down underneath the eye (it helps if you trace where your early morning puffiness would usually be!).
Step 4 to 6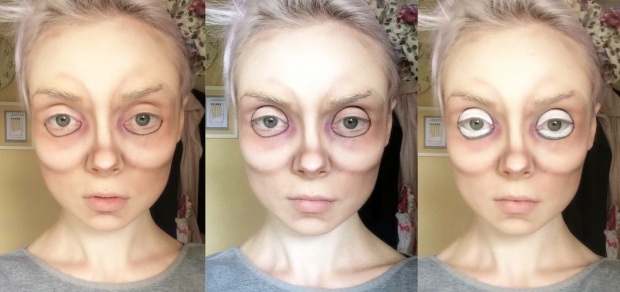
4. Trace a crescent underneath the eye with a liquid black eyeliner.
5. Do the same on the eye lid following the shape of your eyeball to help achieve a circle shape.
6. Colour in the circle using a white eyeliner pencil (NYX Jumbo Eye Pencil in ‘Milk 604’ has a great colour payoff and is really easy to blend). Remember to colour your water line!
Step 7 to 9
7. Using the same taupe eyeshadow draw an upside-down triangle from the base of the cheek towards the jawline. Darken the area around the eye with the same colour. Trace eyebrows using a eyeliner pencil (it saves the mess if you make a mistake).
8. Fill in the brows using a liquid eyeliner – be sure to arch them steeply. Contour around the brows.
9. Cover the lips in your chosen lipstick. Use a liquid eyeliner to bring a line out from the edges of the lips towards the cheek to create a creepy smirk. You could also smudge the under eye circles as I have done here.
Step 10 to 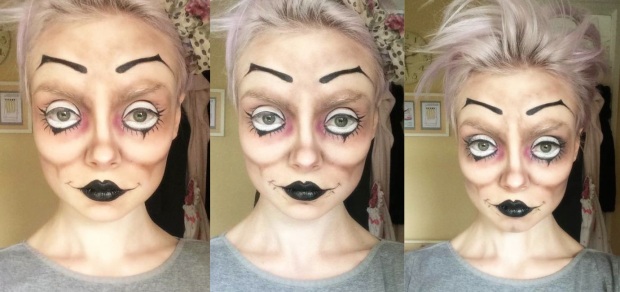 12
12
10. Draw along the upper lash line with an eyeliner and add wispy eyelashes to the crescent you drew underneath your eyes earlier.
11. Smiling with your mouth closed, trace the wrinkles and lines that appear around your lips with an eyeliner.
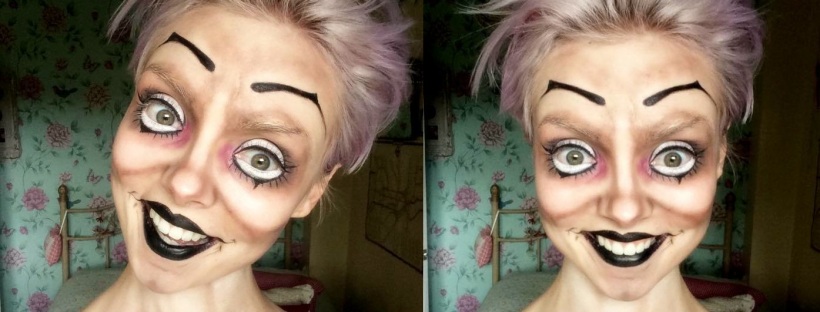
12. With your contouring eyeshadow, add vertical lines from your natural eyebrows up towards your new eyebrows and blend slightly to create frown lines. Add false eyelashes. Poof your hair. And ta da!!!
Hope you like!
Molly x


 This is my ultimate secret weapon. This fluid has a pearlescent finish that has no other purpose (that I know of…), but to make your face glow. It’s like 12 hour’s sleep and a long soak in the bath in a bottle! It can be used alone, under or over foundation: a light sweep is great for adding a subtle shimmer, while a thicker coat is perfect for highlighting.


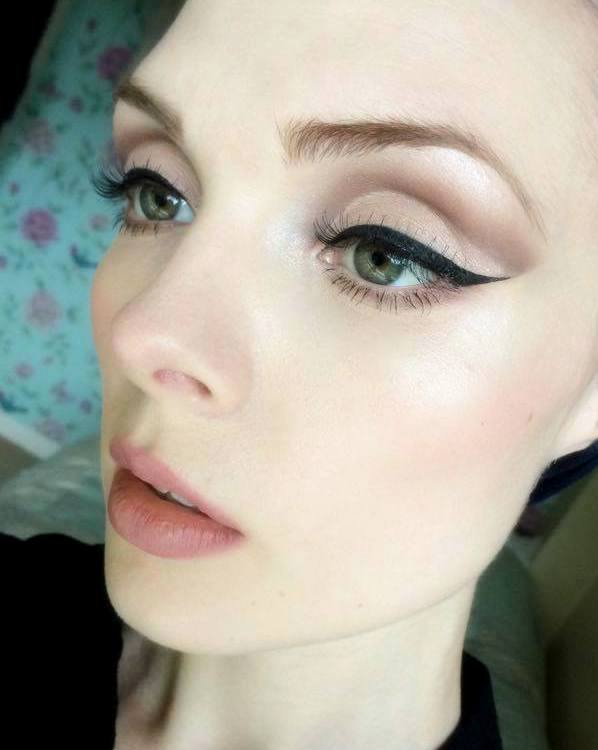
 t’s shape, it’s colouring and it’s definition, as I have done in this picture. Instead of the tear-drop shape, I’ve flicked out the corner of the arc to mimic my eyeliner; added UD’s Naked 2 ‘Blackout’ to my crease; and brought the eyeliner underneath my eye into a point at the inner corner to create a cat-eye effect.

 Think Jennifer Aniston in the first season of “Friends,” or a young Drew Barrymore. After a short revival last summer, brown lipstick has again disappeared… far far away. It seems to be bundled with other cringeworthy 90’s trends – scrunchies, JNCO jeans and mood rings. But if chokers and jelly sandals can make a proper comeback, there’s surely room for coffee, chocolate and chestnut coloured lips.


 How are you incorporating this season’s shades into your day-to-day outfits?